(updated 4/18/20)
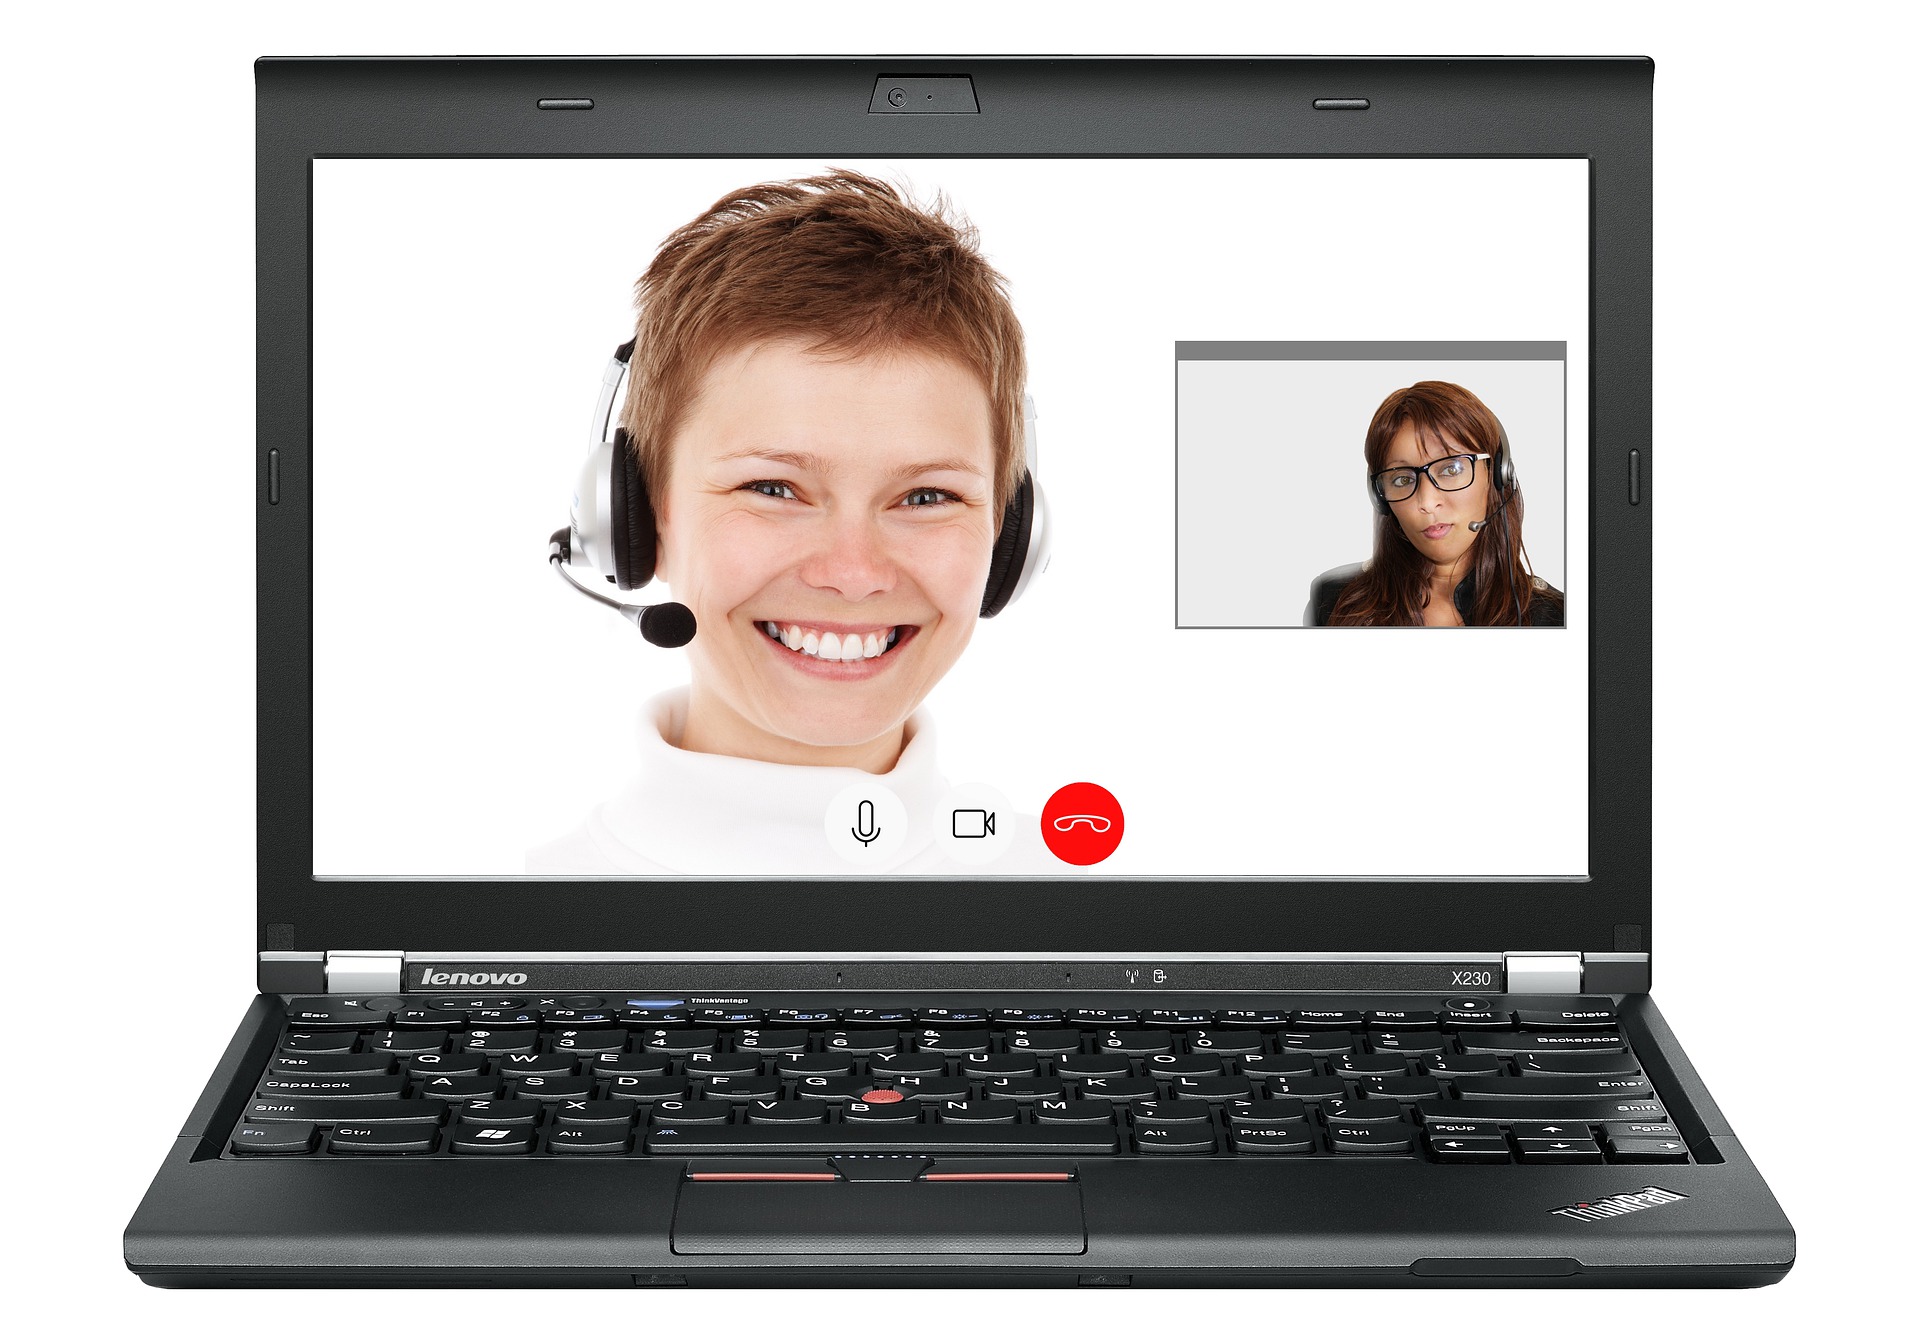
On one of my ZOOM calls last week, two of the participants had really cool backgrounds! I was totally jealous! One looked very professional, and one was a view from space. I asked each person how they changed their background, and now I’m sharing that with you on this post!
It starts with a picture.
OK, I lied – a little! You can start with a picture of your own or a free picture from Unsplash, Pixabay, or create one on Canva (my thanks to Eunice Cunanan at Canva.com for this link!). You can also upload a color background. Check out this article by The Verge – it had some terrific examples of free backgrounds!
Before you start, just a couple of fair warning tips:
- Not all backgrounds play nice with indoor lighting, so make sure you have good lighting to cut down on shadows before your call.
- While they all may look cool, sometimes your internet connection can cause backgrounds to “phase”. That means you might get part of your head not showing, or some other body part that’s on camera might look half-in, half-out. Don’t beam up -check before your call!
Ready to upload!
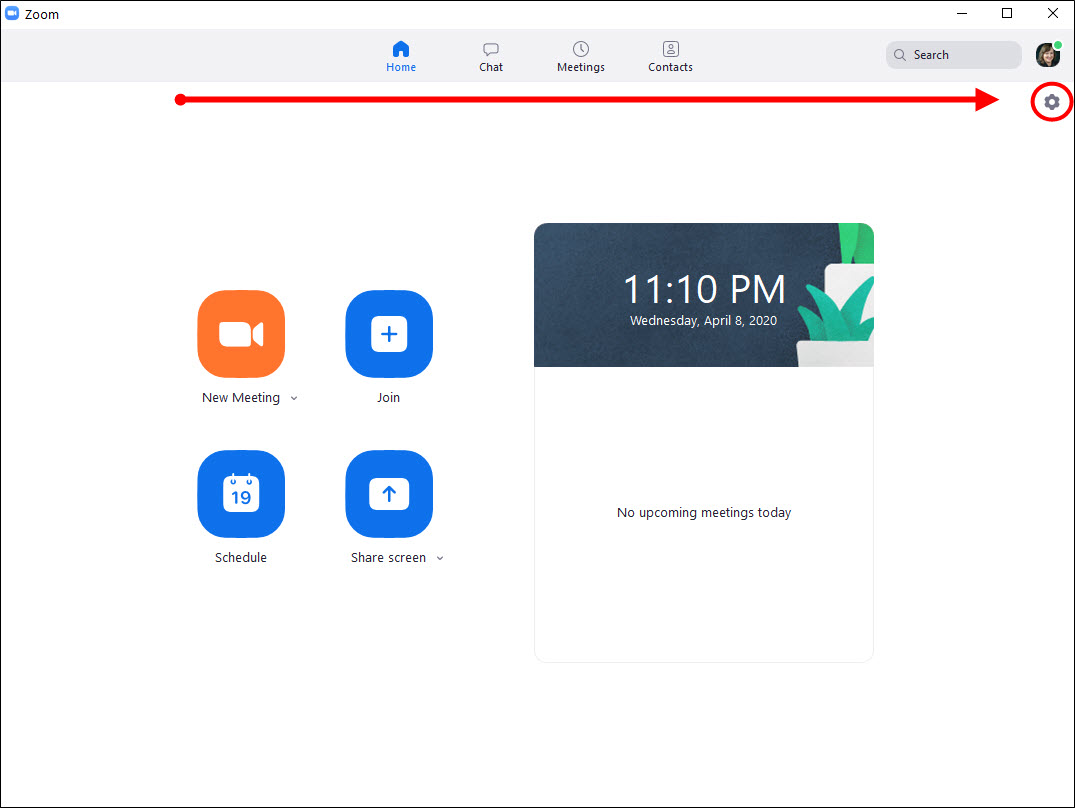
OK, now – on to the fun stuff! This method is for desktop computers and laptops.
- Get your image together and save it! Saving it to a folder on your desktop will make it easier to find.
- Log in to your ZOOM account.
- Be sure you have downloaded the latest version of the Zoom Desktop Client.
- Launch the Zoom Desktop Client.
- Click the settings icon.
- Next, click on Virtual Background. You’ll see a video feed of yourself in the window – don’t panic! This helps you check your image or color before using it.
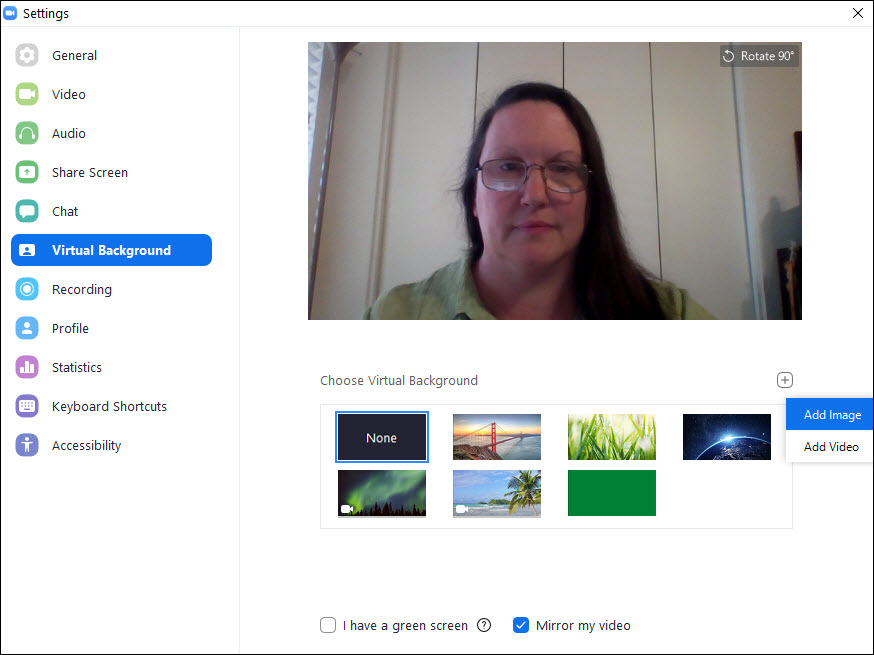
- From here, you can either choose a pre-loaded virtual background or upload one of your own. TIP: I like creating my ZOOM backgrounds on Canva.com – it’s a free sign-up, works in a responsive platform, and easy to use!
- If you want to upload an image, click the little plus symbol just below the bottom right-hand corner of your video feed. Next, click Add Image.
- Find the image you just saved to your computer (hopefully it’s on your desktop!).
- Once you have the image selected, click the Open button.
- Check the live video feed window. How does it look? Like it? Love it? Change it!
A few more quick tips…
- DO NOT wear floral prints or weird stripes. These don’t always look right on video.
- DO wear solid colors as much as possible. Be aware of your background! For example, if your background is a green color, it’s best to not wear red or blue.
- DO try to brand your background! (I’ll cover this in another post.)
- Try to avoid using video for your background; it can be too distracting for a professional setting.
- DO NOT click the small checkbox marked “I have a green screen”. This will really distort your image overlay (you over your background) and cause a TON of phasing! That looks really amateurish.
- If you click the checkbox marked “Mirror my video”, it won’t affect how your audience sees your background; only you will see the video feed changes.
Happy ZOOM-ing!
Be strategic. Be visible. Be found.
Ready to train your employees or organization on how to use ZOOM, especially etiquette? Let’s chat! Email me to schedule a 30-minute training session, to include a short handout and Q&A.
#smallbusiness #businesstips #marketingtips #socialmedia #nonprofits #networking #teleworking #telecommute #workfromhome #visiblymedia