In November 2013, Facebook made a significant change to the way Pages can post status updates. These posts can now be scheduled to appear later, just like social media tool Hootsuite.
Here’s how it works:
- The Page Admin/Manager creates a status update from a recent blog article.
- Add an image or two.
- Include a short code link. I recommend using either ow.ly or goo.gl shorteners.
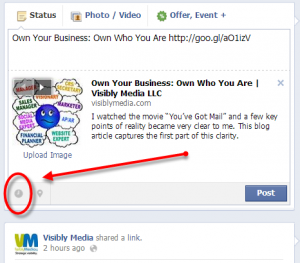
- Click the clock icon to the bottom-left side of the status update box.
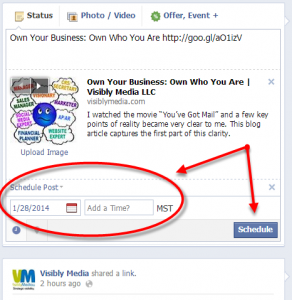
- Schedule the day and time you want this post to appear on your Page’s Timeline.
- Click the “Schedule” button.
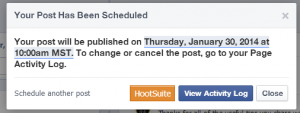
- The next window lets you know your post has been scheduled. You have a choice of clicking either the Hootsuite button, View Activity Log button, or Close button. You can also click the left-side text link “Schedule another post”.
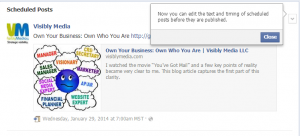
- Click “View Activity Log” to edit the scheduled day/time of a post.
The benefit.
Businesses using only Facebook that aren’t using a social media scheduling tool like Hootsuite can take advantage of creating a more timely article post/update. This introduces a Page admin/manager to the idea of scheduling, particularly if they are new in the position. Also, Page admins/managers can write a “flash sale” post not planned with an editorial calendar and choose to either post the update immediately or schedule out to occur with an offer planned at the local level, providing a more strategic engagement with their audience.
The takeaway:
Measure this engagement to see if it works for your business. You may find it will be easier to invest in a tool like Hootsuite so post scheduling can be done from either your computer or mobile device. Experiment scheduling at different times during the day and measure to find out the most optimum time to use. Make sure to include a hashtag to follow the progress and conversations (or complaints) about the post.
Be strategic. Be visible. Be found.


