I was recently asked by a Marines recruiter and a speaker how either could change their Facebook audience.
For the recruiter, he posts from his Instagram automatically to his Facebook but he has to change the audience for each post (bleah!) – can you say time-consuming and almost double-work? Granted, it doesn’t really take much, but extra steps can add up.
For the speaker, she had just noticed her posts on her profile could not be shared by her Friends (those connected to her profile). I showed her how to change her default audience, and the Share button appeared below her posts!
Now I’ll share with you what I showed both of these folks. Ready to dive in?
What is a Facebook audience?
On social media, an audience is made of individuals who follow you or are connected to you directly. For Facebook, an audience can be as big as the entirety of users (3B as of May 2023), or it can be as small and specific as you decide.
Is there a default audience?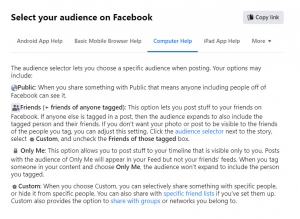
Yes, and it’s controlled by your settings. You may have set your posts to Friends when you first joined, but this can be changed.
What are the different audience types?
- Public. Your posts, stories, videos, etc. are seen by all 3B members on Facebook and the search engines.
- Friends. Your posts, stories, videos, etc. are seen by those you are directly connected with. Unless you tag someone you know, your friend(s) can’t share your posts back to their feed.
- Only Me Just like it says – only you can see this information.
- Custom. When you create this list and save it, you can selectively decide who sees your posts and who doesn’t. You can also set up groups or networks you belong to and create a Custom Audience.
How do I change my default audience?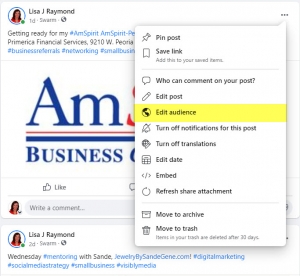
Open a browser window (i.e., Microsoft Edge, Google Chrome, etc.) and log into Facebook. Then…
- Click the three dots to the right of the post for which you want to change the audience.
- Click on Edit Audience.
- Choose the audience you want and click the blue DONE button.
You can also change the audience from your Facebook Settings:
- Click on the arrow just to the right of your profile picture in the upper right-hand corner of your browser.
- Select Settings & Privacy, then Settings.
- On the left side navigation, click on the Privacy link.
- In the middle section, under Your Activity, find “Who can see your future posts?” and click the blue Edit link to the right.

- Click on the button with the pull-down arrow and change your default audience.
Check back for more tips & tricks about Facebook and other social media platforms.
Be strategic. Be visible. Be found.
Ready to start using social media smarter, not harder? Schedule a 15-minute one-on-one coffee chat over ZOOM to talk about strategically incorporating both social media and inbound strategies into your current marketing plan.
Branded ZOOM backgrounds allow businesses to not only add another option for secondary marketing, but also confirm both identity and authority to prospects and customers. Investment starts at $85. Visit our webpage to get started.
#smallbusiness #businesstips #marketingtips #socialmedia #digitalmarketing #visiblymedia #tuesdaythoughts #socialmediamarketing
